
After modifying the APC on my Saab, I decided I wanted a real boost gauge to show the actual PSI of boost I'm getting. However, for nostalgia, I left the stock gauge hooked up!
Also, I wanted this gauge to "part of the vehicle" and did not want to put a pillar pod or under dash pod (where it wouldn't be very visible)
Here's how I did it:
Tools/Materiels needed:
Vacuum line (aprox. 1 1/2 feet)
Vacuum "T" fitting
2 small spade connectors
Wire Crimps/Cutters
Analog clock/info unit (You might want an extra if you ever want to make it stock again)
Aftermarket Boost Gauge (make sure it's not huge! It needs to be about the same size as the analog clock)
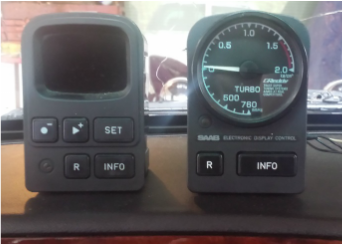
Original (although from 93 instead of 86) clock/info unit and New modified (from 86 9000) clock/info unit with Greddy Boost Gauge
After removing the original Clock/Info unit from a 1986 Saab 9000, I carefully cut/broke the clock unit out, then continued to shave down the plastic until I had a hole big enough for my Greddy Boost Gauge (note: be sure to find the gauge you are going to use before cutting the unit apart!)
Then, connect 2 small lengths of vacuum tubing (aprox. 4" on one side and 6-8" on the other) to a "T" fitting, unplug the vacuum line on the stock instrument cluster boost gauge (this should be able to be done by reaching thru the hole that the clock/info unit came out of) connect the "T" fitting to the vacuum line that you disconnected from the stock gauge, and then plug the smaller length of vacuum line back onto the stock gauge. The other line will be for your aftermarket boost gauge.
Connect the two spade terminals to the end of the lighting wiring on your boost gauge (mine only had 2 wires for the light, if yours has more you will need to see the instructions with the gauge to find the illumination wires)
Now find the 3 wire connector that you disconnected from the back of the clock/info unit (You can tuck the larger connectors back away since we won't be using them anymore)
Connect the positive lead from your Boost Gauge to the White wire on the 3 wire harness, and then the negative lead to the Black wire on the same harness. This will allow the Boost Gauge to illuminate with the rest of the dash lights.
Connect the longer length of vacuum tubing from your "T" connection to the Boost Gauge, and carefully push it back into place.
Fire up your car, and notice that the Boost Gauge drops below 0, this is normal. As you press the gas you will see it raise - Your turbo is kicking in once the Gauge goes above 0, so now you can see how fast you are obtaining boost, and the maximum boost (in PSI or BAR) that you are achieving!
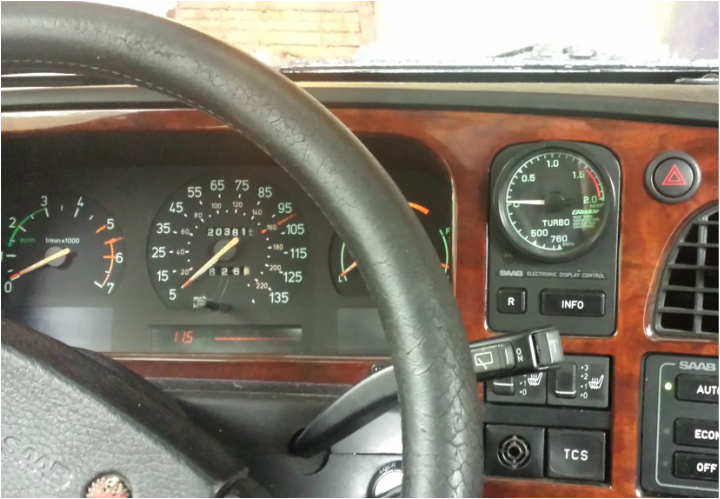
Finished Boost Gauge in dash
Go for a drive and enjoy your custom dash mounted Boost Gauge!
